Sunday, 10 November 2024
The complete guide to diy 12x20 storage shed construction

Alright, you've finally decided to tackle that storage shed project you've been putting off. Good for you! A 12x20 shed is a great size for a lot of things: lawn equipment, bikes, gardening tools, extra furniture... you name it! And building it yourself can be incredibly rewarding. It's a project that'll give you a sense of accomplishment, and you'll know exactly how it was built. So, grab a cup of coffee (or a beer!), put on some tunes, and let's get started.
Step 1: The Planning Stage - Don't Skip It!
Before you rush out and buy lumber, take some time to plan. Think about the following:
Location, location, location! Where's the best spot for your shed? Consider access for your lawnmower, the slope of your yard, sunlight, and proximity to your house.
Foundation: Concrete slab, piers, or a wood frame? Each has pros and cons, so weigh them carefully. Concrete is the most permanent, piers are cheaper, and a wood frame is the simplest.
Building Codes: Check your local building codes. There might be regulations on size, height, and even the distance from your property line.
Budget: Set a budget and stick to it! Don't forget to factor in things like permits, concrete, tools, and even some "oops" money for unexpected expenses.
Design: Do you want a traditional shed with a gable roof or something more modern? Consider adding windows or a door on the side for extra light and ventilation.
Step 2: Gather Your Materials
Here's a list of basic materials you'll need for a 12x20 shed. This list can be adjusted depending on your design.
Lumber: You'll need pressure-treated lumber for the foundation and bottom plates. Use dimensional lumber (2x4s, 2x6s, and 2x8s) for the walls, roof, and framing.
Sheathing: OSB (oriented strand board) is a cost-effective and strong option for sheathing the walls and roof.
Roofing: Choose your roofing material based on your budget and preference. Asphalt shingles are a common and affordable option.
Siding: Vinyl siding, wood siding, or even metal siding are all great options. Choose what suits your style and budget.
Windows and Doors: Select windows and doors that meet your needs. Consider the size and style.
Fasteners: You'll need lots of nails, screws, and even some galvanized steel strapping for added strength.
Paint or Stain: Protect your shed from the elements with a good coat of paint or stain.
Other Materials: Don't forget things like flashing, caulk, insulation, and house wrap.
Step 3: Laying the Foundation
This is where things get serious. The foundation is the most important part of your shed.
Concrete Slab: This is the most durable option but can be expensive. You'll need to pour a concrete slab that's at least 4 inches thick.
Concrete Piers: These are a good alternative if you don't want to pour a large concrete slab. You can use pre-made concrete blocks or have piers poured on site.
Wood Frame: The simplest option, but less durable than concrete. Build a frame using pressure-treated lumber and place it on concrete blocks for support.
Step 4: Framing the Walls
Now it's time to get those walls up!
Cutting the Walls: Cut the lumber to size for the walls. Use a circular saw and make sure your cuts are accurate.
Assembling the Walls: Connect the wall studs with the bottom and top plates. Use a level to ensure your walls are plumb (perfectly vertical).
Adding Bracing: Bracing is crucial for strength and stability. Add diagonal bracing in the walls to prevent them from bowing.
Step 5: Building the Roof
Time to give your shed a roof over its head!
Rafters: Cut and install the rafters that will support the roof sheathing. Make sure they are properly spaced and anchored to the wall plates.
Roof Sheathing: Install the OSB sheathing to create a solid base for the roofing material.
Roofing: Install the roofing material according to the manufacturer's instructions. Don't forget the flashing around the edges of the roof.
Step 6: Finishing Touches
You're almost there! Now for the details.
Siding: Install the siding of your choice. Follow the manufacturer's instructions.
Windows and Doors: Install the windows and doors. Make sure they are properly sealed and weatherproofed.
Paint or Stain: Paint or stain the exterior of your shed. This will protect it from the elements and give it a nice look.
Step 7: Interior Work (Optional)
If you plan on using your shed for more than storage, you can add some interior features:
Flooring: You can install wood flooring, concrete flooring, or even epoxy flooring.
Shelves: Build shelves or install pre-made shelving units for extra storage.
Electricity: Running electricity to your shed can be useful for lighting and maybe even a small appliance.
Congratulations! You've Done It!
You've just built your very own 12x20 storage shed! Sit back, admire your work, and enjoy the satisfaction of a DIY project well done.
Some Final Tips:
Safety First: Always wear safety goggles and gloves when working with power tools and sharp objects.
Take Your Time: Building a shed is a project that requires patience. Don't rush through it.
Don't Be Afraid to Ask for Help: If you're not comfortable with any part of the project, ask a friend or a family member for help.
Have Fun: This is a project that should be enjoyable. Don't let it become a source of stress.
Now, go out there and build a shed that you'll be proud of! And remember, it's not just a shed, it's a space for your dreams, your hobbies, your projects, and your stuff! So get out there and get building!

How to build a low-cost 8x10 shed that’s strong and sturdy

Alright, so you're thinking of building an 8x10 shed, huh? That's a great size! Perfect for storing tools, bikes, lawn equipment, or maybe even a little workshop. But you want it to be strong and sturdy, and you don't want to break the bank, right? I get it! Let's talk about building a shed that ticks all those boxes.
First Things First: Planning is Key
Before you start ordering lumber and swinging a hammer, take some time to plan everything out. This will save you headaches later, trust me.
Decide on a location: Think about where your shed will go and whether you'll need a permit. Check your local building codes, too. You don't want to be in a situation where your shed has to be moved or torn down later.
Choose your materials: You can go fancy with pressure-treated lumber for the floor and foundation, but you can also save some money with regular wood. Just make sure to treat it with a sealant or paint to protect it from the elements.
Draw a blueprint: It doesn't need to be fancy, but having a basic sketch with dimensions is super helpful. This will help you figure out how much lumber you need and how everything will fit together.
Get your tools ready: You'll need a good saw (circular saw, miter saw, or both), a drill, a level, a tape measure, a hammer, and some nails or screws. A helper is always a good idea too, especially for lifting those heavier pieces of wood!
Foundation: The Solid Base
The foundation is the backbone of your shed. Here are a couple of options:
Concrete: This is the most durable and long-lasting option, but it can be more expensive. You'll need to pour a concrete slab or create a concrete block foundation.
Pressure-treated lumber: This is a more affordable option, and it's easy to build. You can create a simple platform with 4x4 posts and pressure-treated 2x4s for the joists.
Framing: The Skeleton
The framing is what gives your shed its shape and strength.
Wall framing: Use 2x4 lumber for the walls, and make sure to build them sturdy! You want to use a combination of studs and header boards to support the roof and ensure the walls don't bow or sag. Consider bracing the walls diagonally with additional pieces of 2x4 to add extra stability.
Roof framing: You can go with a simple gable roof, which is easy to build, or a more complex hip roof, which is stronger and more weather-resistant. You'll need rafters for the roof, and make sure you use enough for good support.
Door and window openings: Don't forget about your door and window openings! Frame these out carefully, using headers to support the weight of the roof.
Sheathing: The Skin
Once the framing is done, you'll need to add sheathing to the walls and roof. This gives the shed a solid surface to attach the siding and roofing to.
Wall sheathing: Use plywood or OSB sheathing for the walls. Make sure to attach it securely to the framing with nails or screws.
Roof sheathing: Use plywood or OSB for the roof, but consider using a thicker sheathing for better structural support.
Siding and Roofing: The Finish
Now it's time to add the finishing touches.
Siding: You have lots of options for siding, from traditional wood to vinyl, metal, or even cedar shake. Think about your budget and the look you want.
Roofing: Shingles are the most popular roofing option for sheds, but you can also use metal roofing or even a rubber membrane.
Finishing Touches:
Flooring: You can use plywood, OSB, or even a concrete floor for your shed. Think about what you'll be storing in your shed and choose a flooring that can handle the weight.
Windows and doors: Make sure to install your windows and doors carefully, and seal them well to prevent drafts and leaks.
Insulation: If you plan to use your shed in colder weather, consider adding insulation to the walls and roof.
Painting: Give your shed a fresh coat of paint to protect it from the elements and give it a nice look.
Troubleshooting and Tips
Building a shed can be a fun project, but you're bound to run into a few bumps along the way.
Measure twice, cut once: I know it sounds basic, but it's super important! A little mistake in your measurements can lead to big problems later.
Use a level: Always double-check that your walls and roof are level.
Don't be afraid to ask for help: If you're struggling with a step, don't be afraid to ask a friend or family member for assistance.
Take breaks: Building a shed can be physically demanding, so make sure to take breaks and stay hydrated.
Cost-Saving Tips
Here are some ways to save money on your shed project:
Buy lumber in bulk: You'll often get a discount if you buy your lumber in larger quantities.
Shop around for prices: Compare prices at different lumberyards and home improvement stores.
Look for salvaged materials: You might be able to find affordable lumber or other materials at a local salvage yard.
Do the work yourself: Building your own shed will save you the cost of hiring a contractor.
Remember, building a shed is a learning experience. Don't be afraid to make mistakes, learn from them, and enjoy the process! You'll be proud of your new shed, and you'll have a great sense of accomplishment knowing you built it yourself. Happy building!
Diy firewood storage shed: materials, tips, and plans
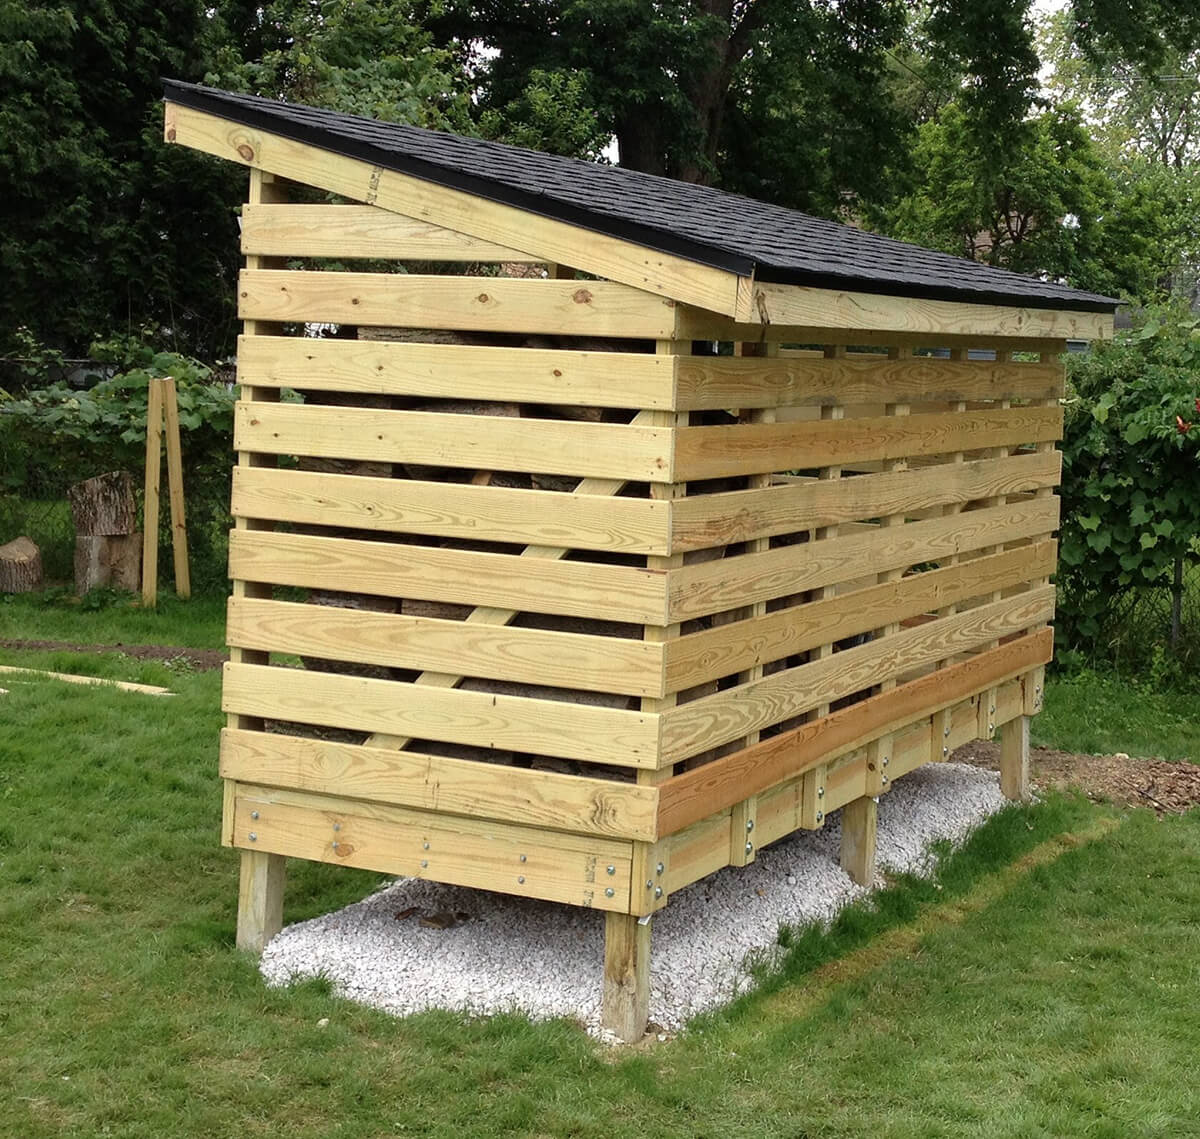
Alright, you're ready to tackle a firewood storage shed, huh? You want to keep that precious wood dry, safe, and organized, right? I'm here to help you build something awesome, not just some flimsy pile of planks. We'll chat about the materials, share some clever tricks, and even look at a few plans to get you started.
Choosing the Right Materials:
First, let's talk materials. You don't want to go cheap here â€" you want your shed to last. Here's a breakdown of what works best:
Foundation: You can go simple with a gravel pad, or step up to a concrete slab for a more durable base. Gravel is cheaper and quicker, but a slab is longer-lasting.
Framing: Pressure-treated lumber is your best bet, especially for the bottom plates and anything touching the ground. It'll resist rot and insects, keeping your structure sound for years.
Walls and Roof: Think plywood or OSB (oriented strand board) for the sheathing. They're strong, affordable, and easy to work with.
Roofing: A good quality asphalt shingle is the classic choice. They're affordable, durable, and come in a wide range of styles.
Siding: Go with something weather-resistant like cedar, composite, or vinyl. Cedar looks amazing and lasts forever, but it's pricier. Composite and vinyl are cheaper and low-maintenance, but don't have the same natural charm.
Doors: A solid wooden door is ideal, but you can use a pre-hung metal door too. Make sure it's sturdy enough to handle the elements and protect your wood.
Tips for Building a Badass Firewood Shed:
Here are some tips that'll take your shed from ordinary to exceptional:
Think about Ventilation: You need airflow to keep your wood dry. Add vents to the walls and roof, especially near the bottom. This is crucial for preventing rot and mold.
Build a Sloped Roof: A slight slope will help water drain off, keeping your shed drier.
Don't Forget Insulation: Even though you're not heating the shed, adding insulation to the roof and walls will keep the temperature more stable inside.
Plan for the Future: Consider making the shed big enough to hold a couple years' worth of firewood. You'll thank yourself later!
Go for a Raised Floor: This will help keep the wood off the ground and prevent moisture damage. Use pressure-treated lumber for the floor joists, and you can even add a layer of plywood or decking boards for a finished look.
Think about Access: Make sure the doors are big enough to easily move in and out those hefty logs. If you're using a wheelbarrow, plan your entryway with that in mind.
Add a Roof Overhang: This will protect the wood from rain and snow.
Use a Strong Foundation: You want a foundation that won't settle or shift over time. This is especially important for heavier sheds.
Essential Tools You'll Need:
You'll need a few tools to get the job done right. Here's a list to get you started:
Tape measure: Crucial for accurate measurements and planning.
Level: To make sure your walls are straight and the roof is level.
Saw: A circular saw, miter saw, and a hand saw are essential for cutting lumber.
Drill/Driver: For drilling holes and attaching fasteners.
Hammer: For driving nails and securing components.
Screwdriver: For working with screws.
Safety glasses: To protect your eyes from debris.
Gloves: To protect your hands from splinters and rough surfaces.
Planning Your Shed:
Now, let's talk about design and planning. You can find some free plans online, or you can create your own. Here are some key things to consider:
Dimensions: How big do you need the shed to be? Think about the amount of firewood you'll store and the shape of your yard.
Style: Do you want a simple, rectangular shed or something more elaborate?
Materials: Have you decided on the materials for your shed?
Location: Where will you be building your shed? Make sure you have proper clearance and meet any local building codes.
Building the Shed:
With your plan in place, you're ready to start building! Follow these steps:
1. Lay the Foundation: Prepare your foundation by clearing the area and leveling it. If you're using a gravel pad, compact the gravel and make sure it's sloped slightly to help drainage. If you're using concrete, pour the slab according to your plans.
2. Build the Frame: Start with the bottom plates and build up the walls using pressure-treated lumber. Make sure everything is square and level.
3. Install the Sheathing: Attach plywood or OSB sheathing to the walls for strength and support.
4. Build the Roof: Construct the roof rafters according to your plans and attach them to the top plates.
5. Add the Roof Sheathing: Attach plywood or OSB sheathing to the roof rafters.
6. Install the Roofing: Lay down the asphalt shingles according to the manufacturer's instructions.
7. Add the Siding: Attach the siding to the walls, keeping in mind any overhangs or details you want to add.
8. Install the Doors: Hang the doors and make sure they are securely fastened.
9. Finish the Interior: If you want a more finished look, add flooring, paint the interior, and install shelving.
10. Install Ventilation: Add vents to the walls and roof for proper airflow.
Final Touches:
Once your shed is built, give it a final inspection. Make sure everything is secure and watertight. If you're using cedar siding, you might want to give it a coat of sealant to help protect it from the elements.
And there you have it! You've built a firewood storage shed that will keep your wood dry and organized for years to come. You can even add some personal touches like a decorative door or a custom sign to make it your own.
Remember, it's about creating a functional and attractive space for your firewood, and you can absolutely do it yourself! So grab your tools, put on your safety glasses, and get ready to build something amazing. You've got this!
How to build an 8x12 shed: save money, get more storage

Hey there, fellow DIY enthusiasts! Are you tired of that overflowing garage? Maybe you're drowning in clutter, wishing for a dedicated space for all your stuff. Well, listen up because I'm about to share the secret to building your very own 8x12 storage shed â€" and guess what? You can do it on a budget!
Building your own shed is a rewarding project. It's a great way to save money compared to buying a pre-built shed, plus you get to customize it to your exact needs. And trust me, when you're done, you'll be grinning from ear to ear, knowing you tackled this project yourself.
Step 1: Planning Your Storage Sanctuary
Before you dive headfirst into building, take some time to plan. This step is crucial to making sure your shed is the perfect size and fits your specific needs.
Location, Location, Location: Where will your shed reside? Think about sunlight, access, and proximity to your house.
Foundation, Foundation, Foundation: You'll need a solid foundation, and there are several options: concrete, cinder blocks, or even pressure-treated wood. Each has its pros and cons, so do your research.
The Floor Plan: Do you need shelves? A workbench? Think about how you want to use the space and sketch out your plan.
Material Matters: Decide on the material for your shed walls and roof. Wood is affordable and easy to work with, but you can also choose metal or vinyl for a more durable option.
Permitting: Check your local building codes for any permits required. You don't want to get caught off guard!
Step 2: Gathering Your Crew and Supplies
Now it's time to recruit your crew (maybe a friend, a neighbor, or even a willing family member) and start gathering your materials.
Tools of the Trade: You'll need a basic set of carpentry tools: hammer, saw, drill, tape measure, level, etc. Don't forget safety gear â€" safety glasses, gloves, and hearing protection are essential!
Building Materials: This is where you can really save money! Check out local lumber yards for deals on wood. Consider buying in bulk to save even more. You'll also need screws, nails, roofing felt, shingles, and a variety of other materials, depending on your chosen design.
Don't Forget the Finishing Touches: Think about windows, doors, trim, and paint to add character to your shed.
Step 3: Building the Foundation: The Base of Your Success
The foundation is crucial for the stability of your shed.
Concrete: If you're going for a permanent, durable foundation, concrete is the way to go. But be prepared for a bit more work. You'll need forms to hold the concrete in place, and it takes a few days to cure.
Cinder Blocks: Cinder blocks are a budget-friendly alternative to concrete. They are relatively easy to lay and provide good drainage. You'll need mortar to hold the blocks together.
Pressure-Treated Wood: For a simple and quick foundation, use pressure-treated wood. This is a good option if you're on a tight budget and prefer a quicker build time.
Step 4: Framing the Walls: Building the Bones of Your Shed
The walls are the backbone of your shed, so make sure they're strong and stable.
Framing Lumber: Use studs of 2x4 or 2x6 depending on your shed's size and the climate you live in.
Cutting and Assembly: Use your saw and tape measure to cut the studs to the correct length and assemble them into wall panels.
Corner Bracing: Use diagonal bracing to strengthen the corners of your wall panels.
Sheathing: Once the walls are framed, you'll need to add sheathing (usually plywood or OSB) to provide a smooth surface for siding and roofing.
Step 5: Raising the Walls: Lifting Your Shed to New Heights
Time to get your crew involved! You'll need to lift and secure the wall panels to the foundation.
Plumb and Square: Use a level to make sure the walls are straight and a tape measure to ensure they are the correct distance apart.
Anchoring: Once the walls are in place, secure them to the foundation using anchor bolts or brackets.
Step 6: Adding the Roof: Creating a Protective Canopy
The roof protects you and your belongings from the elements, so it's an important part of the build.
Rafters: The roof will be supported by rafters. Cut them to the correct length and angle, and install them on top of the walls.
Roof Sheathing: Add plywood or OSB sheathing to the rafters to create a smooth surface for the roofing material.
Roofing Material: Choose from asphalt shingles, metal roofing, or even cedar shakes. Asphalt shingles are the most affordable option, while metal roofing is more durable.
Step 7: Finishing the Details: Putting the Finishing Touches on Your Masterpiece
You're almost done! Now it's time to add the final touches that will make your shed truly yours.
Siding: Add siding to cover the exterior walls of your shed. You can choose from vinyl, wood, or metal, depending on your budget and desired style.
Doors and Windows: Install a door and any windows you planned for. Make sure they fit securely and operate smoothly.
Trim: Add trim around the windows, doors, and roofline to give your shed a polished look.
Painting: Paint the interior and exterior of your shed to your liking. This will protect the wood and add a personal touch.
Step 8: Putting it All Together: Celebrating Your New Storage Oasis
Congratulations! You've built your very own 8x12 storage shed. Now it's time to stock it with all your treasures and enjoy the extra space.
Money-Saving Tips for Building Your Shed:
Plan Ahead: Planning is key to avoiding costly mistakes and ensuring you have the right materials on hand.
Shop Around: Don't be afraid to shop around for the best deals on lumber and other materials. Local lumber yards often have sales and discounts.
Consider Reclaimed Materials: If you're feeling eco-conscious, consider using reclaimed wood or other materials for your shed. It's a great way to save money and give old materials a new life.
DIY It: The more work you can do yourself, the more money you'll save. Don't be afraid to tackle new tasks, but always prioritize safety.
More Storage Tips:
Vertical Storage: Use shelves, bins, and hanging organizers to maximize vertical space.
Utilize Walls: Add pegboards or hooks to store tools, garden supplies, and other items.
Label Everything: Labeling your containers and shelves makes finding things a breeze.
Keep it Organized: Regularly declutter and organize your storage space to keep it functional.
Building your own 8x12 shed is a rewarding project that can add value to your property and provide you with much-needed storage space. It's a great way to learn new skills, save money, and create something unique to your needs. Just remember to plan, be patient, and don't be afraid to ask for help if you need it. And most importantly, enjoy the process and have fun!
How to add finishing touches to your diy garden shed construction
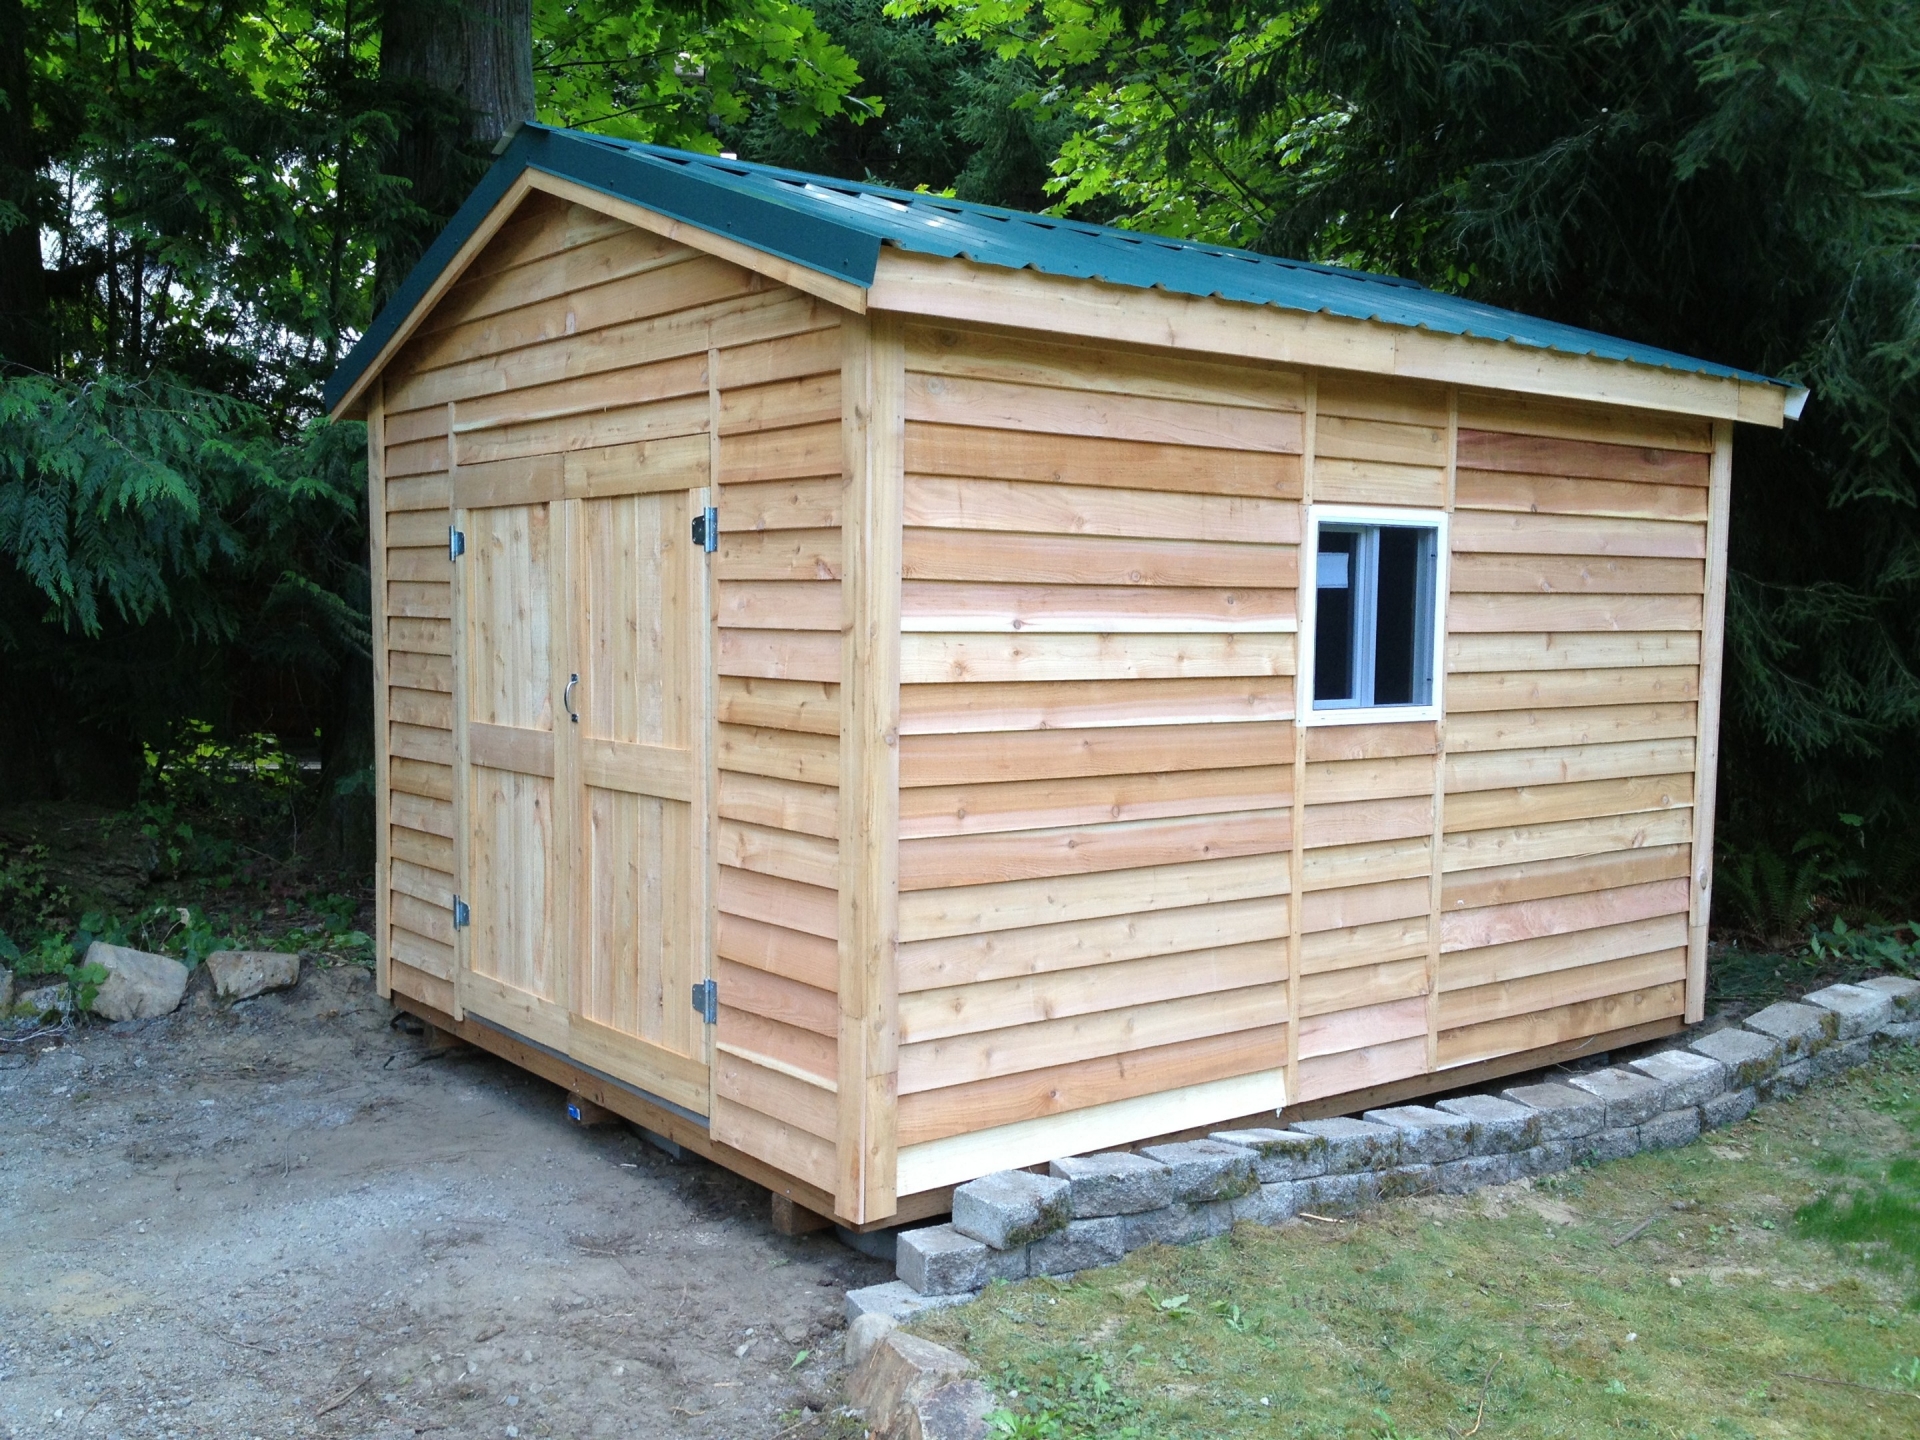
Alright, you've built the bones of your garden shed. The walls are up, the roof is on, and you're probably feeling pretty proud of yourself. But hold your horses, friend, because the real fun â€" and the chance to add a little personality â€" starts now! We're about to talk finishing touches, the things that turn a plain old shed into your own personal haven.
## Doors, Windows, and Beyond: Choosing Your Features
Let's start with the basics: doors and windows. Sure, you could go with the standard builder's grade stuff, but where's the fun in that? Think about the style of your shed and the overall look you're going for. A Dutch door adds a touch of farmhouse charm, while French doors can give it a more elegant vibe. A single, solid door works great if you're prioritizing security.
Windows are a great way to add natural light and ventilation. You can go with classic, gridded windows for a traditional look, or opt for modern, geometric designs to give your shed a contemporary feel. If you're planning on using the shed as a workshop, consider including a large window for good lighting while you're crafting. And don't forget about small, operable windows for ventilation, especially if you're planning to store anything that might be susceptible to moisture.
Now, let's get creative! You can add so many unique features to your shed to really make it your own. A small porch with a trellis for climbing plants adds a cozy outdoor spot. A built-in workbench with a sturdy countertop is a great addition for any workshop. If you're building a potting shed, include a window box for herbs and flowers. Let your imagination run wild!
## Get That Look: Siding, Roofing, and More
Now, it's time to choose the finishing materials for your shed. These decisions will have a huge impact on the final look and feel of your structure.
Let's talk siding first. You can go for a classic look with wood shingles or clapboard, or opt for modern materials like vinyl or fiber cement for low-maintenance options. If you're going for a rustic look, consider using reclaimed wood, giving your shed a unique charm. And don't forget about paint! A fresh coat of color can transform your shed from plain to pretty in an afternoon.
The roof of your shed is another important design element. Think about the style of your home and the overall look you're trying to achieve. A traditional asphalt shingle roof works well for most sheds, but you can also consider using metal roofing, cedar shake, or even slate for a more unique look.
## Personal Touches: Details That Make the Difference
Now it's time to get into the nitty-gritty details that will really make your shed shine. Think about the little things that add character and functionality.
Hardware: Don't underestimate the power of good hardware! Swap out the basic door handles and hinges for something more stylish. Consider antique brass or black iron for a classic look, or modern stainless steel for a more contemporary feel.
Lighting: A well-lit shed is a functional shed. Consider installing a light fixture on the ceiling or adding a few strategically placed outdoor lights around the exterior. For a truly unique touch, try incorporating solar-powered lights that charge during the day and illuminate the shed at night.
Flooring: The flooring of your shed can be as simple or as elaborate as you like. Concrete is a practical choice for durability, but you can also opt for wood floors, pavers, or even a rubber mat for a softer feel. For a truly unique look, consider using salvaged wood or reclaimed materials.
Insulation: If you're planning on using your shed year-round, adding insulation is a great way to make it more comfortable and energy-efficient. Choose a material that fits your budget and needs, such as fiberglass, foam, or cellulose.
Decorations: Let your creativity run wild when it comes to decorating your shed! Hang plants on the walls, add a few colorful throw pillows to a seating area, or display your favorite gardening tools in a stylish way. The possibilities are endless!
## Beyond the Basics: Making Your Shed Work for You
Now that you've added all the finishing touches, it's time to consider how you'll use your shed and make it truly functional.
Storage: The most common use for a shed is for storage. Maximize your space by installing shelves, drawers, and hooks to keep everything organized. Think about what you plan to store and design your storage solutions accordingly.
Workshop: If you're planning to use your shed as a workshop, you'll need to add a few extra elements to make it functional. A workbench with a sturdy countertop is a must-have, and good lighting is essential for working on projects.
Office: If you need a quiet place to work or study, your shed can be transformed into a peaceful retreat. Add a comfortable chair, a desk with adequate lighting, and maybe even a small heater for year-round use.
Guest room: With a little imagination, your shed can become a charming guest room. Add a bed, a small dresser, and some cozy decorations to create a welcoming space for visitors.
## Enjoy Your Labor of Love
There you have it â€" your very own garden shed, complete with all the finishing touches that make it truly unique! Remember, building a shed is a labor of love, so don't rush the process. Take your time, enjoy the creative process, and let your personality shine through. After all, your shed is an extension of your home, so make it a place you love to spend time!
A diyer’s guide to building a 10x12 garden shed
Hey there, fellow DIY enthusiast! Tired of your gardening tools taking over the garage? Dreaming of a dedicated space to store your mower, potting bench, and all those extra garden goodies? Well, buckle up, because we're about to embark on a journey to build your very own 10x12 garden shed. No need to break the bank on a pre-made structure â€" we're doing this the DIY way!
Let's Get Started!
First things first, let's make sure you've got the right tools for the job. You'll need the basics:
Measuring Tape: This is your trusty sidekick. Measure twice, cut once, right?
Level: A level will ensure your shed stands tall and proud.
Circular Saw: For cutting lumber to size.
Hammer: For driving nails, of course!
Drill: For drilling pilot holes (makes life easier) and attaching hardware.
Safety Glasses & Gloves: Protect yourself!
Safety Gear: A helmet, hearing protection, and maybe even some work boots are good ideas.
Choosing the Right Materials:
Now, let's talk about the materials. The foundation of your shed is key:
Concrete Blocks: Strong, durable, and easy to work with.
Pressure-Treated Lumber: For the foundation, floor joists, and any parts that will be in contact with the ground. It's designed to resist rot and decay.
Next, let's build the frame:
2x4 Lumber: The backbone of your shed!
Plywood: For sheathing the walls and roof.
Roofing Shingles: For protection from the elements.
Exterior Siding: To give your shed a finished look.
Windows & Doors: Add some light and ventilation.
Laying the Foundation:
Now, let's get those concrete blocks laid out! Grab some gravel and compact it down. This will provide a level base for your blocks. Remember, you'll need to account for the thickness of the blocks when determining the overall dimensions of your shed.
Building the Floor:
Once the blocks are set, we can start building the floor. Cut and lay pressure-treated lumber for the floor joists, making sure they are level and spaced evenly. Attach them securely to the blocks with galvanized screws. Now, cover the joists with plywood for a solid floor.
Erecting the Walls:
Next, we move onto the walls. Measure and cut your 2x4s for the wall studs, and attach them to the floor joists. Create the openings for doors and windows, ensuring they're square and plumb. Now, sheathe the walls with plywood, ensuring you have a solid structure.
Roof Time!
Roof time! We'll be using a simple gable roof design. Cut the rafters and attach them to the wall plates. Remember to use a level to make sure the rafters are correctly angled. Sheathe the roof with plywood and lay down the roofing shingles. Voila! You've got a roof over your head (or rather, over your shed).
The Finishing Touches:
Time to make your shed look its best! Start by adding the siding. Choose a style that complements your garden. Then, install the doors and windows. Don't forget to add a little bit of trim to accentuate the edges. Finally, paint or stain your shed to your liking!
Bonus Tip: Consider adding a small deck or porch to your shed. This will give you an extra space to enjoy your garden and relax.
Important Reminders:
Safety First: Always wear safety glasses and gloves when working with power tools.
Measure Twice, Cut Once: A little extra precision goes a long way.
Seek Help if Needed: Don't be afraid to ask for help if you're struggling with a step.
Congratulations!
You've done it! You've built a beautiful and functional 10x12 garden shed. Now, go forth and organize your gardening tools, plant your favorite flowers, and enjoy the fruits of your labor! Remember, building a shed is a fun and rewarding project, so don't be afraid to get your hands dirty!
How to build a firewood storage shed that protects your wood all year
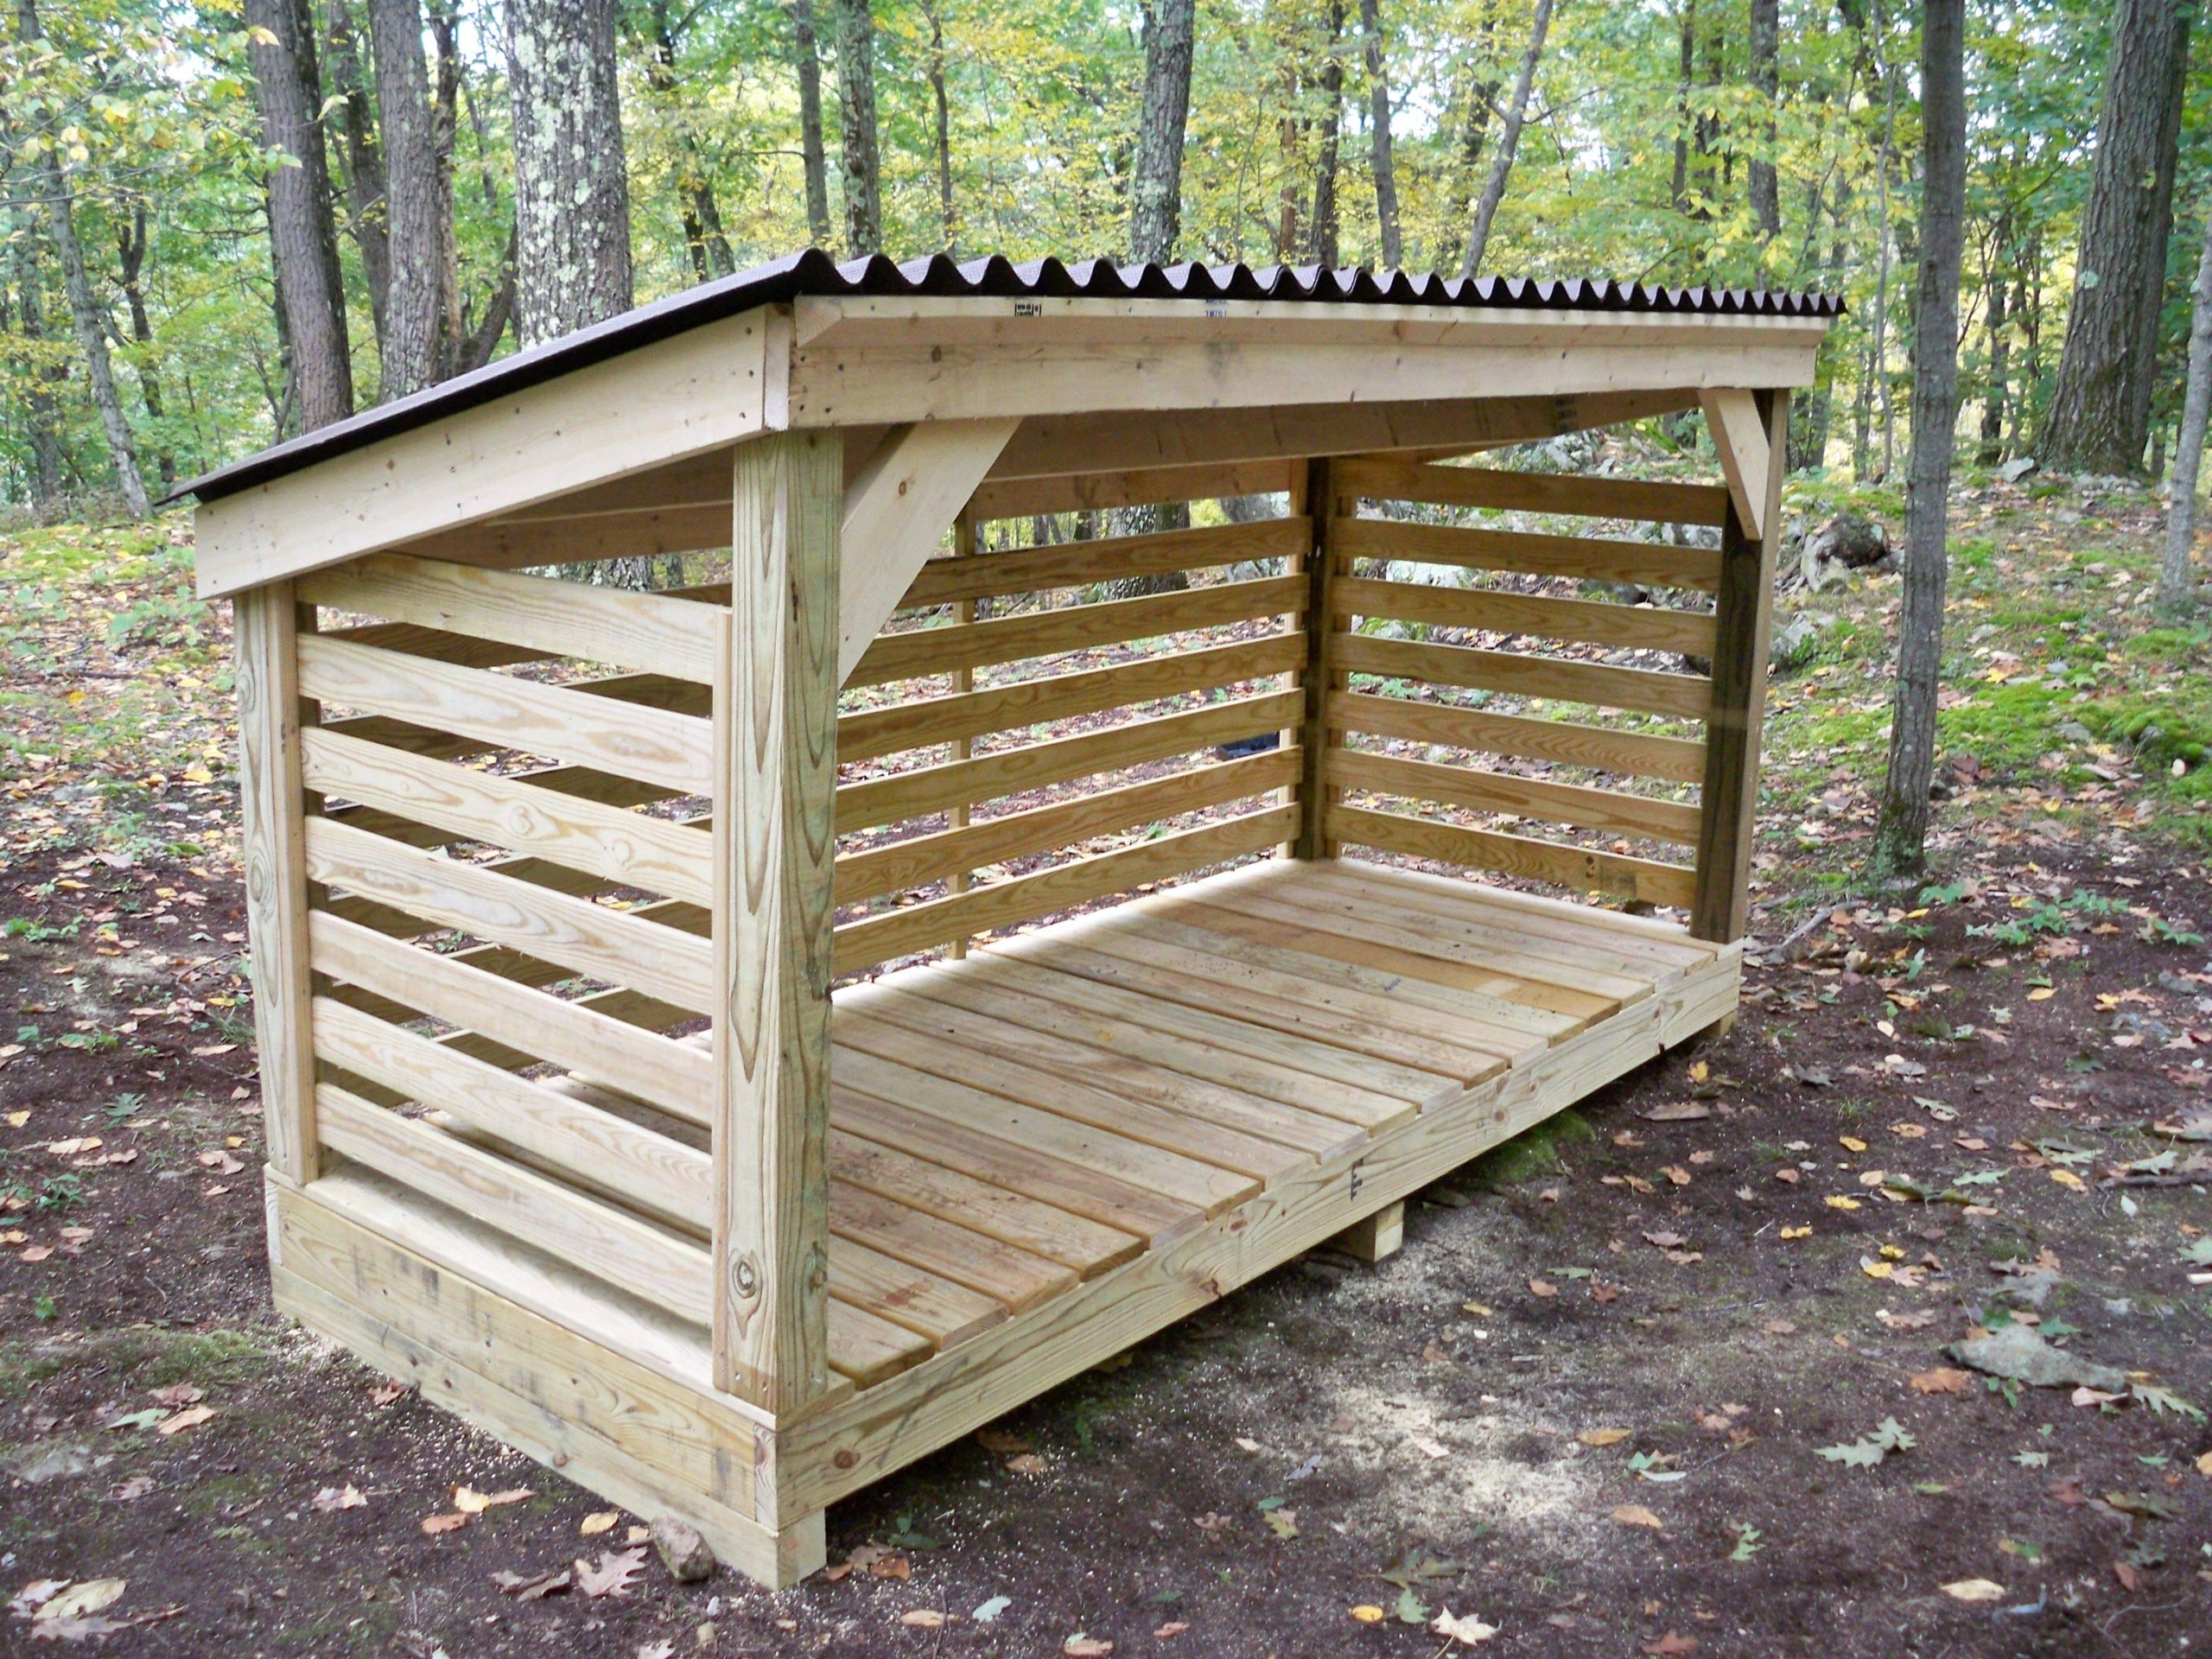
Alright, so you've got a nice pile of firewood, and you want to keep it dry and ready to go all year long, right? A firewood storage shed is the way to go! It's not rocket science, and you can build a pretty awesome one yourself. You don't have to be a seasoned carpenter, just have some basic DIY skills and a healthy dose of enthusiasm. Let's get into it!
First things first: Planning and Design
Before you start hammering and sawing, you need to get organized. This is like planning a road tripâ€"you don't want to end up stranded without a decent shed!
Size matters: How much firewood do you need to store? Think about the amount you use in a typical season. If you're a serious fire enthusiast, you'll want a larger shed. Measure your potential firewood pile and add some extra space for wiggle room.
Location, location, location: Choose a spot that's easily accessible, close to your fireplace or wood stove, but not too close to your house (fire safety!). Consider drainage â€" you don't want a soggy shed!
Budget your time and money: What materials are you going to use? Do you want a simple shed or something more fancy? Decide on your budget, and stick to it!
Next, let's talk about the materials:
Foundation: A simple concrete pad is a solid choice for a firewood shed. It's durable, level, and easy to clean. You can also go for a gravel base if you're feeling thrifty.
Framing: Use pressure-treated lumber for the bottom plates and any parts that will touch the ground. This will help resist rot and insects. For the rest of the framing, choose quality lumber that won't warp or crack.
Walls: You can go with plywood or OSB (oriented strand board) for the walls. Plywood is a bit more expensive, but it's smoother and easier to paint. Don't forget to choose the right thickness for your needs!
Roof: A simple gable roof is a good option. You'll need roofing shingles or metal panels. Remember, you want something that can withstand the elements!
Doors: Choose solid, weather-resistant doors to keep the rain and wind out. You might want to consider a double door system for easy access.
Optional extras: Think about adding ventilation to prevent mold and mildew. You can also install shelves or a rack system to keep your firewood organized.
Now, let's build the shed!
1. Laying the foundation: Start by marking out your shed’s footprint on the ground. Pour the concrete for your pad, making sure it's level and strong. If you're using gravel, spread a good thick layer and tamp it down tightly.
2. Framing the walls: Cut your bottom plates to the exact length of each wall. Attach them to the foundation using concrete anchors or lag screws. Then, build the wall frames, making sure the studs are spaced correctly for strength.
3. Constructing the roof: Build your roof trusses and attach them to the wall frames. If you're using shingles, install felt paper for water resistance. Then, lay the shingles or metal panels.
4. Adding the siding: Attach your chosen siding to the wall frames, ensuring a tight seal to keep out the weather.
5. Installing the doors: Hang your doors on strong hinges. You might want to add a lock for security.
6. Finishing touches: Paint or stain the exterior to protect the wood and add curb appeal. Add any ventilation or shelf systems you want.
Time to stock your shed!
Stacking technique: Stack your firewood in a crisscross pattern to allow air circulation. This will help keep it dry and prevent mold.
Leave space: Don't pack the wood too tightly. Leave some room between the stacks for airflow.
Keep it dry: Always cover your wood before a heavy rain. If you see any signs of rot or mold, remove and replace those pieces immediately.
Tips for building a great firewood storage shed:
Plan ahead: Measure carefully and think through every step. It's better to take your time than to rush and make mistakes!
Use quality materials: Don't skimp on the lumber. Choose durable materials that will withstand the test of time.
Get help if you need it: If you're not confident about certain tasks, ask a friend or neighbor for help. It's better to have a second pair of hands!
Enjoy the process: Building a firewood storage shed can be a lot of fun. Take your time, enjoy the process, and celebrate your accomplishment when you're finished.
Extra tips for protecting your wood:
Keep it off the ground: This will help prevent rot and moisture damage.
Use a tarp: Cover your firewood with a tarp or waterproof cover during heavy rains.
Don't store it in direct sunlight: Sunlight can cause wood to dry out and crack.
Avoid storing it near trees: Trees can attract insects and pests that can damage your firewood.
Building a firewood storage shed is a great project for any homeowner. It's a practical investment that will keep your firewood dry, organized, and ready for use all year round. So, what are you waiting for? Get out there and start building!